Monday, December 14, 2009

Making Materials

One of the reasons I have been blogging a lot less because I have been busy at work in the factory.  Teaching is a lot of work no matter where or how you teach.  Public school teachers spend countless hours grading assignments, we Montessori teachers spend countless hours making materials.  And that’s just what I’ve been doing.  Making materials. 

Our classroom has quite a bit more to make because we are not yet well-established.  We officially began transitioning our classroom towards Montessori just last year, so we have quite a ways to go.  We began last school year with just some basic math materials and some random grammar materials. At the time I had just begun my Saturday trainings and so I was not aware of how to make materials, nor how to use most of them.  We also had no math problem cards, no culture or science materials. 

I am quite thankful to my instructors at Spring Valley Montessori, who whenever they introduced a new material always explained how it could be made, or showed how a near-substitute could be fashioned and used in place of the respective material.  This is quite valuable for a teacher working with limited funding, and it’s also neat that most of the materials - be they Golden Beads, Fraction Insets, or the Stamp Game – can be made at home.  While we all like nice, beautifully hand-crafted materials from Nienhuis (who doesn’t just love to gaze at their fabulous catalog?), it is nice to know that there is the option of making your own materials. 

We have just started a new theme about Respiration and Circulation.  I decided to make a definition book titled “How we Breathe”.  A definition book has a very simple format so that it introduces new concepts to children in a simplified manner.  The format is one picture on the page, with the part you are defining colored or outlined in red or another color.  The definition of that part is provided below the drawing.  For example, in my definition book, I colored each part of the respiratory system and then gave the definition.  If you look below to the right, you will see the nasal cavity is colored in red, and below that the definition and description of the nasal cavity is given in writing.

Here are pictures of the definition book process: the synthesizing of complex information into a simple format.

Fundraiser.Dec.2009 023 Fundraiser.Dec.2009 024

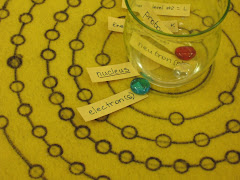
I also made other materials related to respiration, such as three-part cards on (a simplified version of) the formula for cellular respiration.  While pink is for anatomy, I chose red for cellular respiration because it applies to zoology as well, which is red.

                             Fundraiser.Dec.2009 026

I have finished making these materials, but have yet to take the photos of them, so I will be posting the final products later on. 

Friday, December 11, 2009

Make Your Own Lung

We have begun learning about the respiratory system, and to begin with, we made lungs!  This activity demonstrates to the children how the diaphragm functions and helps you breathe.  All you need is:

  • 1 plastic bottle (a narrow 2-liter water bottle works best, we found)
  • 1 regular-sized red balloon
  • 1 larger balloon
  • 1 straw
  • tape
  • scissors

Here is an picture of instructions already made up:

school.Dec.2009 069

Here is the tray I had made to be available on the shelf:

school.Dec.2009 067

school.Dec.2009 068 Here are the balloons and the straw.  My example lung is on the right. school.Dec.2009 070
   

When you pull down on the bottom balloon that represents the diaphragm, the inner balloon (or lung) expands and fills with air.  As you push in your “diaphragm”, the “lung” contracts and the air is pushed out of the straw, or “trachea”. 

The students did a far better job than I did:

school.Dec.2009 066

Monday, December 7, 2009

Making Paint II


Nov.14.2009.school 074 

After learning how paint was made, I took a look on the internet to see if I could make paint with my students.  So with a little gum arabic and turmeric, we made yellow, and with chili powder and gum arabic we made a red-orange.  Then I also purchased synthetic pigments, one back and another blue, so we could have other colors to paint with.


First I mixed each pigment on a palette, and then gave each student a paper and some paint brushes.

School.November.18.2009 005

School.November.18.2009 010

School.November.18.2009 014 School.November.18.2009 017

They got creative and had a lot of fun.

Saturday, November 28, 2009

Making paint I

After learning about Mughal painters, I discussed with the children what materials were used to make paint.  I prepared cards with descriptions (not quite 3-part cards) and presented each to the children.  Five of the pigments are minerals or oxide.  One comes from a bright insect called the lac insect, another pigment comes from the indigo plant, and the most interesting (and the strangest) is peori; which is a yellow that comes from the urine of cows fed a diet of only mango leaves. 

Nov.14.2009.school 163Nov.14.2009.school 172 Nov.14.2009.school 165 Nov.14.2009.school 170
Nov.14.2009.school 169 Nov.14.2009.school 166

Nov.14.2009.school 167 Nov.14.2009.school 171

Friday, November 20, 2009

Please go home!

Today my coteacher and I witnessed an incredible phenomenon.  It was five minutes to 3 this Friday afternoon, and we had forgotten to let our students know at ten to 3pm that it was time to clean up.  I asked the students to please clean up.  Three minutes later, the students were still working.  I asked the students to clean up again, but half-heartedly, sort of amazed that they were not moving from their work.  Then after 3pm, our students were still working – many of them engrossed in their work, not wanting to leave.  I told them “Please, I know you don’t want to go home, but I do!  I love you all, but please, go home!”  At this point they all looked at me and laughed, and then I laughed.

As an adult, I envision people counting down the minutes until they get to go home on a Friday afternoon.  It’s Friday! Thank God it’s Friday!  But our students were happy to stay at school, and probably would have stayed longer had we not said anything and had their parents not been waiting downstairs in the hallway to take them home.

Sunday, November 1, 2009

“What’s Funny When”

I was in the doctor’s office and decided to pick up a parenting magazine (unfortunately I cannot remember the name), and stumbled across an article on what is funny to children at what age.  I would like to share it what they presented.

4-6 Months:
    Bouncing, tickling, other physical stimulation

6-12 Months:
   Unusual behavior of familiar people
      (peek-a-boo)

12 Months - 5 Years:
  Misuse of objects
     (“Let me answer my shoe phone”)

2 to 4 Years:
   Nonsense words, Misnamed Objects
    (Dr. Seuss comes to mind, here)

3 to 6 Years:
   Conceptual incongruity
     (“That bear seems to be enjoying his ice cream cone”)

7 + Years:
   Word play, puns
     (Knock, knock jokes)


Saturday, October 31, 2009

Crochet!

Classroom.etc.Oct.2009 193

Here are some pictures from our students’ crochet projects.  Most of them are crocheting scarves, however some of them made mistakes and their scarf became more like a hat!  So I guess we’ll be making scarves and hats.  Some of the students have parents helping them at home, others are learning as they go in the classroom.  They are doing a great job.


Classroom.etc.Oct.2009 194 Classroom.etc.Oct.2009 187
Classroom.etc.Oct.2009 188

Classroom.etc.Oct.2009 189